Pages

Showing posts with label reclaimed recipes. Show all posts

Tuesday, July 19, 2011

Make your own (edible) paint


Here's a really easy way to make paint for you child, without having to worry about them eating it!

1. Take a few tablespoons of powdered milk.
2. Add in a small amount of water and mix. You're looking for a consistency somewhat like paint, so keep it on the thick side. Add more water or milk as needed.
3. Transfer it into individual paint containers.
4. Put a few drops of different coloured food grade food colouring into each container and mix it in. If you don't want to use this type of colouring then you would need to explore using natural colouring from foods such as beetroot, boiled egg shells etc.


Joshua loves to paint in the bath, he also enjoys eating it as well which is fine by me. Once he finishes with it he dumps the whole lot into the bath and he ends up with lovely, soft skin when he finally climbs out (milk is a natural skin softener - didn't Cleopatra have milk baths?)

Thursday, May 26, 2011

Recycled Headbands


When I exercise I wear a headband to keep my hair back and off my face. I've been using the same little number for months now and have to wash it constantly.

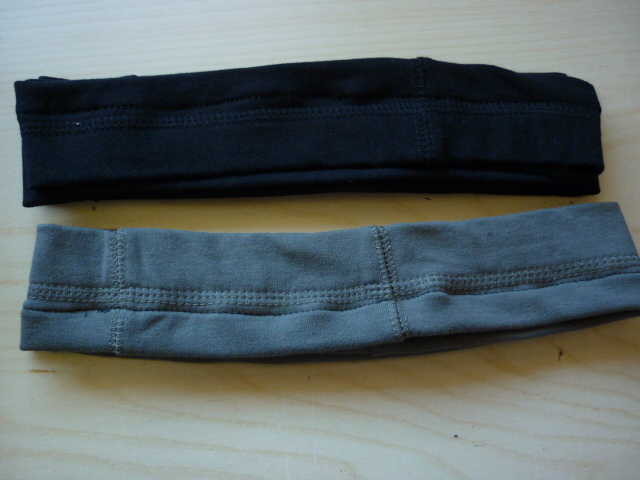
Today when I was taking up some yoga pants it suddenly dawned on me that I could use the cut off hems and recycle them into some much needed headbands! So that is exactly what I did.

I overlocked all the cut off edges with black thread - I'm too lazy when it comes to overlocking and changing thread colours. My overlocker is quite old and temperamental so I try to avoid upsetting it with too much poking and prodding. No one but me is going to see the results anyway. The other ends already had the hems in place so I didn't need to touch those.

I then folded over the overlocked edges and sewed into place with a straight stitch. Now I have 5 new headbands waiting to be used ( I would have had 6 as I took up 3 pairs of pants but I lost one to the overlock monster muahahaaa)

Wednesday, April 27, 2011

Make your own fabric softener

I've been using vinegar around the house for a few years now. Every month I would buy 2 litres, water it down to make 4 and then leave in the sun to "set". Recently, I came across another way to make it last even longer as a fabric softener. Normally I use between 1/2 cup to 1 cup to rinse clothes or Josh's cloth nappies. With this new recipe I have been able to reduce my usage so my 4 litres will now last quite a while!!

In an empty 2 litre vinegar bottle add

2 tablespoons vinegar
2 tablespoons eucalyptus oil
2 tablespoons cheap hair conditioner

Top up with water to fill the bottle then shake to mix. Use anywhere from 1/2cup to 1 cup depending on what you have washed. I tend to use 1 cup for cloth nappies, cleaning rags, kitchen towels, linens and white clothes.

Monday, January 24, 2011

Zip lock back drying rack

"Use it up, wear it out, make it do or do without" that's my goal for the entire of 2011.

I had my first challenge last night when I decided I had to find a better system to hang up my washed zip-locked bags. I found this great design on the web that I could make myself, but I don't think we have any dowels so it would mean having to spend money.

So I came up with this idea instead.

Tuesday, January 18, 2011

Bathroom wipes

This morning I did a cull of Joshua's summer play t-shirts and made up another batch of bathroom wipes aka "wee wipes". I have been using these for the past 2 1/2 years. After starting out with cloth diapers 2 years ago I soon got over the icky factor and switched over to cloth toilet paper. Well, I will let you in on a little secret - I use these for both number 1's and 2's. What difference is there between soiled cloth diapers and soiled bathroom wipes - only your attitude to hold you back LOL.

My template measures 30cm by 20cm. I use weights to hold the paper down and cut out with scissors. If your fabric is large enough you can use both the front and back of the t-shirt. Also, be sure that you only use 100% cotton or cotton/lycra and not cotton/polyester.


I go through the leftover scraps and cut up any usable bits to make kitched wipes and spectacle wipes.


Fold lengthwise then cross wise to get four layers. Sew on three sides only, then trim off any uneven edges.

Cut off and keep any buttons.

The wipes are stored in a basket on the left and used ones in a bucket on the right. Come nappy wash day they get chucked into the wash together.

Wednesday, January 12, 2011

Brown rice milk

As I have stopped eating sugar and most commericial soy, oat or rice milks are made with added sugar I have attempted to make my own "milk". For my first attempt I started with brown rice.

Take 1 cup rice and boil it for 1 hour in 2 cups of water and 1/4 teaspoon each of cinnamon and cardamon. Watch towards the end as the water cooks out completely and you don't want it to burn.

Once cooked add 2 cups fresh water and blend the whole thing with a stick blender. Pour into a colander lined with muslin and place over a bowl. Keep it in the fridge for 1 hour. Once cooled you can strain it by "milking" it with your hands to remove the liquid from the pulp. At this point it will look too thick so add another 2 cups of water. If you are happy with the consistency you can stop at this point. For a runnier milk keep adding water until you reach something you will be happy with. I ended up with 2 litres in total. It has a lovely taste that reminds me of rice pudding.


Tuesday, December 14, 2010

Chocolate & Cherry Muffins (no sugar or egg)


For this week's muffin batch I used up some left over cherries and added some cocoa powder to make chocolate & cherry muffins. My muffin recipe uses no egg, sugar and only a small amount of olive oil. Here is the basic recipe:

Muffins
120g plain flour
60g wholemeal flour
60g buckweat flour
15g baking powder
6g or so of salt can use less or leave out
2 mashed bananas
2 tablespoon soya flour
180g milk
56g olive oil
56g pear or apple puree

For choc/cherry:
1/3 cup cocoa powder
200g cherries (fresh or frozen)

I cook these at 200degC for about 30min. Ovens vary, the original recipe that I got this from before tweaking to my liking suggested baking for 20min.

YUM!

Sunday, December 5, 2010

Sweet potato, carrot, apple and red lentil soup


I've been waiting to try out this recipe as it sounded delicious. With all the produce I have to get through I thought I would do a test run. It is divine and really easy to make. Definetly going to become one of my favourites.

Recipe
Saute a chopped onion in some oil
Add 1/2 teaspoon each of cumin,chilli powder, paprika and ginger paste
Add 2 large chopped sweet potatos
3 large chopped carrots
1 large chopped apple
Add 1/2 cup red lentils and 4 cups of stock
Bring to the boil, turn down and simmer for 30min.
Cool and puree. If it is too thick for your liking add some water to thin it down somewhat. I like mine thick and add some grated cheese over the top.

Tuesday, November 2, 2010

Scrap soup


Here is the result of my first attempt at scrap soup. The first photo shows the veggie scraps and reserved cooking liquids that I had collected over the last week. The second shot is the final result. It was very delicious indeed and I was sceptical as it seemed like one huge hodge podge! This is what I did...

The Base
Sauteed onion
Added veggies and cook 15 min
Added the reserved liquid
Added 1 bay leaf,1 teaspoon tumeric, 1 teaspoon whole black peppers, 3 stock cubes
Brought to boil
Added leftover rice and chicken
Simmered 15 min
Added peas and stale bread.
And hey presto!

Saturday, October 30, 2010

Uses for cheese wrapping


Try using the plastic that is used to wrap processed cheese with as freezer guard as well with the added bonus of it already being pre-cut!

Use for plastic fruit and vegetable bags


I know I should really be using re-usable netting type bags to buy my fruit and veggies in but I'm not quite there yet. So the next best thing is to find a way to re-use them and this is what I do.
Just cut off the bottom and then up both sides and you have free freezer guard to wrap and/or seperate your food when you place them in a container to be frozen.

Thursday, October 28, 2010

Apple and pear sauce from core scraps


I've been saving all my apple and pear cores in a container in the fridge over the last couple of weeks with the idea of cooking them and making some fruit sauce. Well, I finally had enough scraps to give it a go and I think it's a winner!!

I placed the scraps in a steamer - there's a reason why I used a steamer and why I didn't just place them into a saucepan full of water - read on....
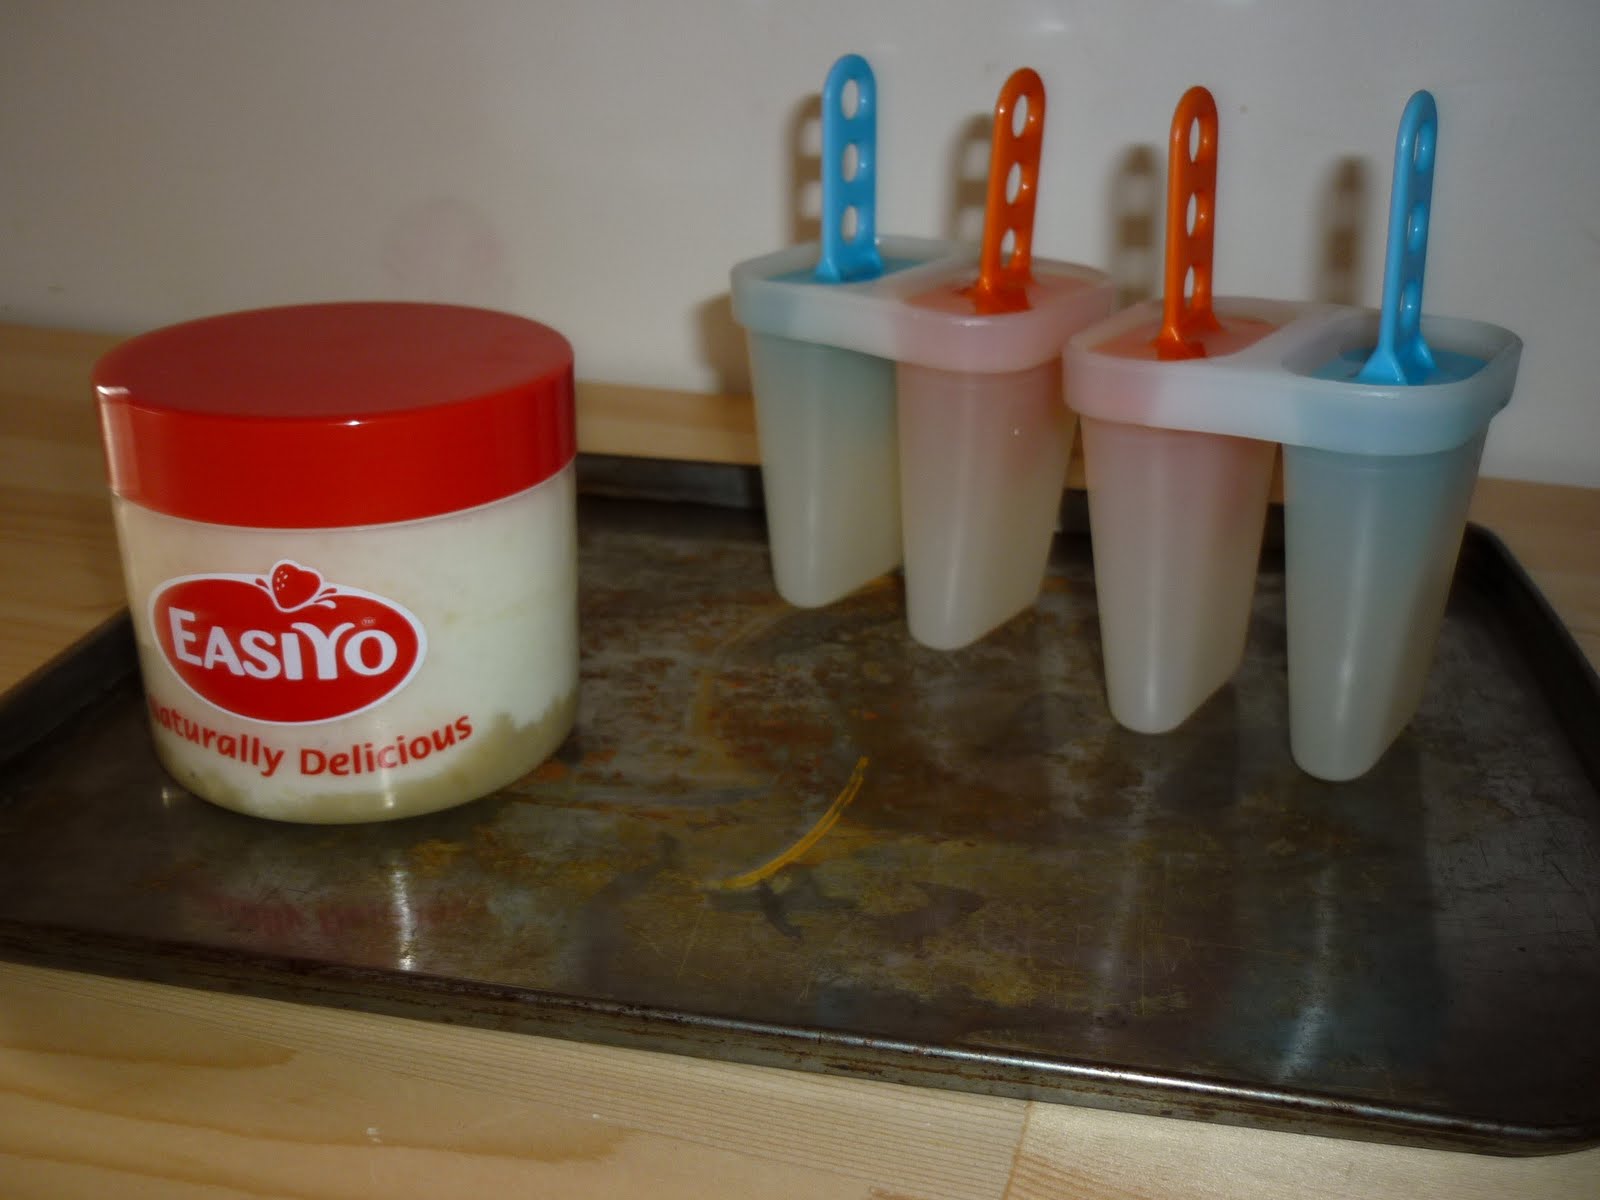
I cooked them for 10 minutes then allowed it to cool for another 10 minutes. The liquid was poured into a cup and reserved. The core scraps went back into the pot and pureed with my stick blender. Then I just strained the pulp by pushing it through a sieve and voila! It took a bit of elbow work but I got there! The scraps left in the strainer went into the compost bin, the sauce went into some Easiyo youghurt that I had made up waiting to be flavoured (the picture only shows one pot - there was enough to make up two pots but Josh and I ate one it was so yummy) and the liquid was used to make iceblocks.