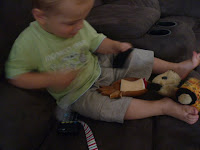
You will only need a ribbon, a button, a needle and thread, some coloured felt and a bowl to present it in. I did use my sewing machine for one step but you could easily just hand sew if you don't have one. Now as I am in the middle of a year long no spend challenge I could only use the materials I already had on hand. Of course you could always choose the colours for your project.

Steps:
Cut ribbon to desired length.
Fold over one end on both sides to form a "v" shape and sew the button on.
Cut your felt squares (I cut to 7.5cm x 7.5cm) and cut a slit in the middle to fit your button.
Take one of the squares and stitch it to the other end of the ribbon (this stops the rest of the squares from falling off). This is the step that you could hand sew or machine sew.

You're done!!

Use a large button for this project. Once your child is proficient at putting the squares on, you could have them take them off the ribbon which is a little trickier. Then, when they have this down pat you could then give them items of clothing with button closures and have them practice buttoning up and un bottoning.


You're just too clever Maria. Something like that would've been great for my two when they were younger. Good work! xx
ReplyDelete